Quickstart
Follow this guide to set up Shipcheck in just a few minutes and start offering shipping protection on your Shopify store.
Before you begin, make sure to Install Shipcheck from the Shopify App Store.After installation, open the Shipcheck app from your Shopify admin. You'll be guided through an easy onboarding process.
Set protection pricing
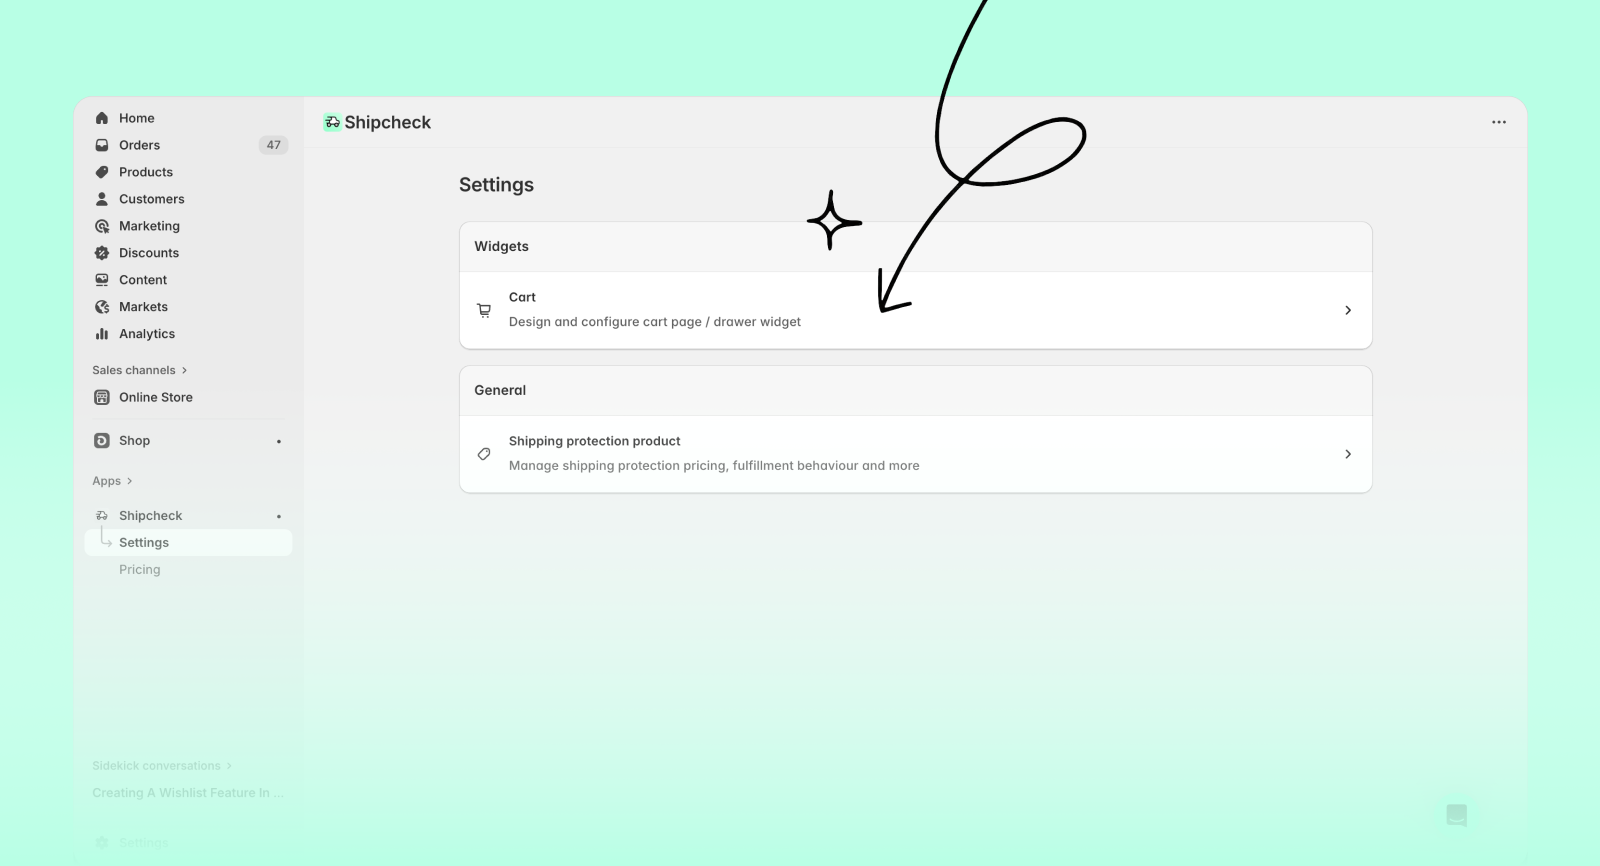
- Inside the app, go to Settings → Shipping protection product.
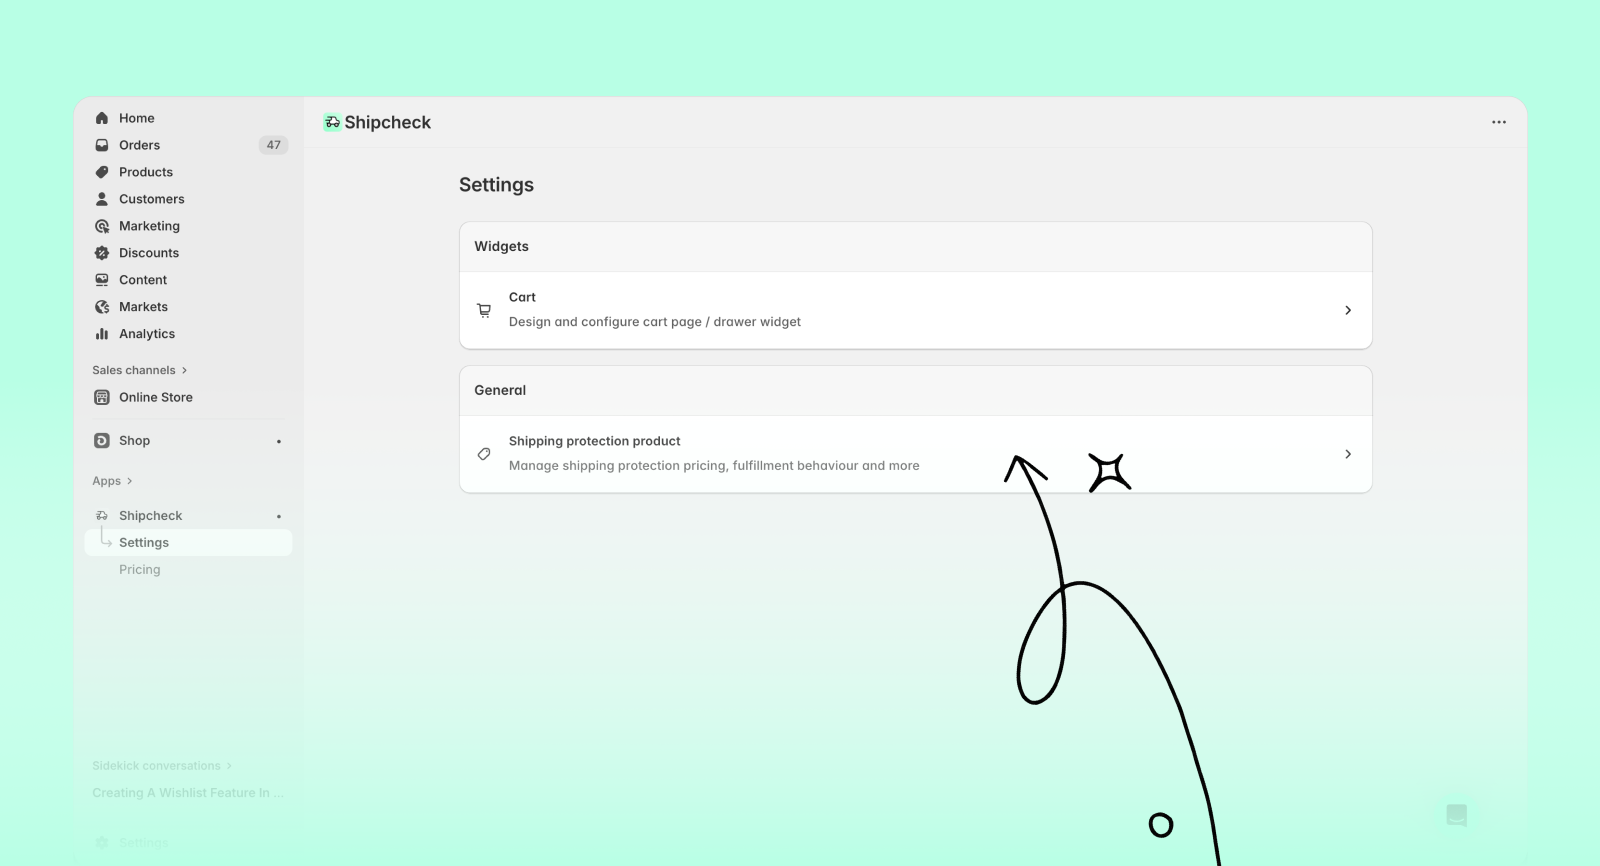
- Enter the price you want to charge for shipping protection.
- Click Save.
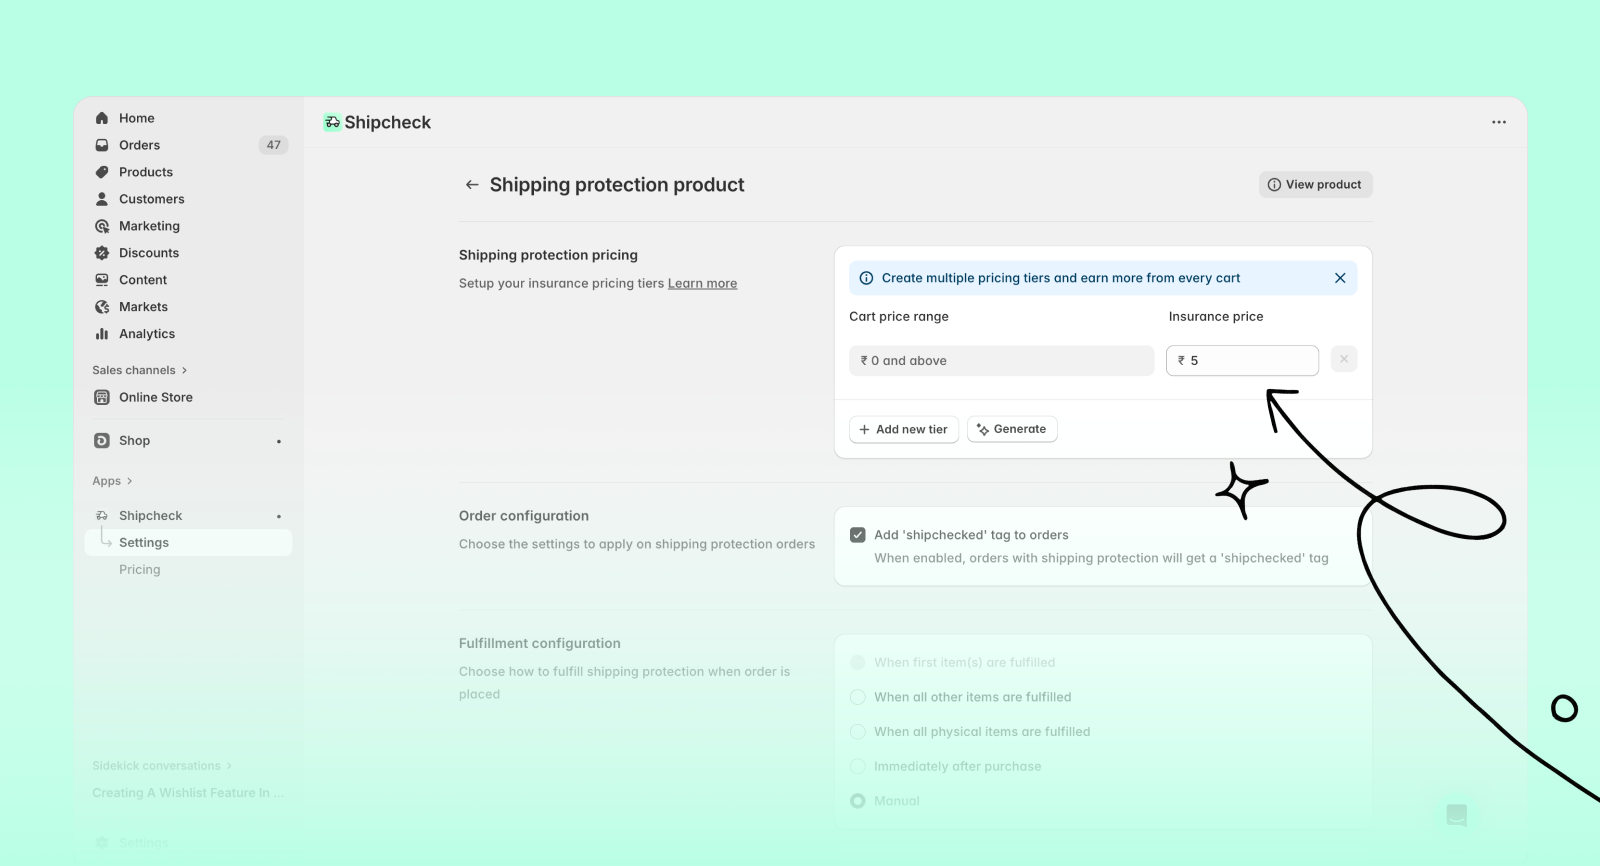
You can also set up different prices based on different cart value ranges. Learn more
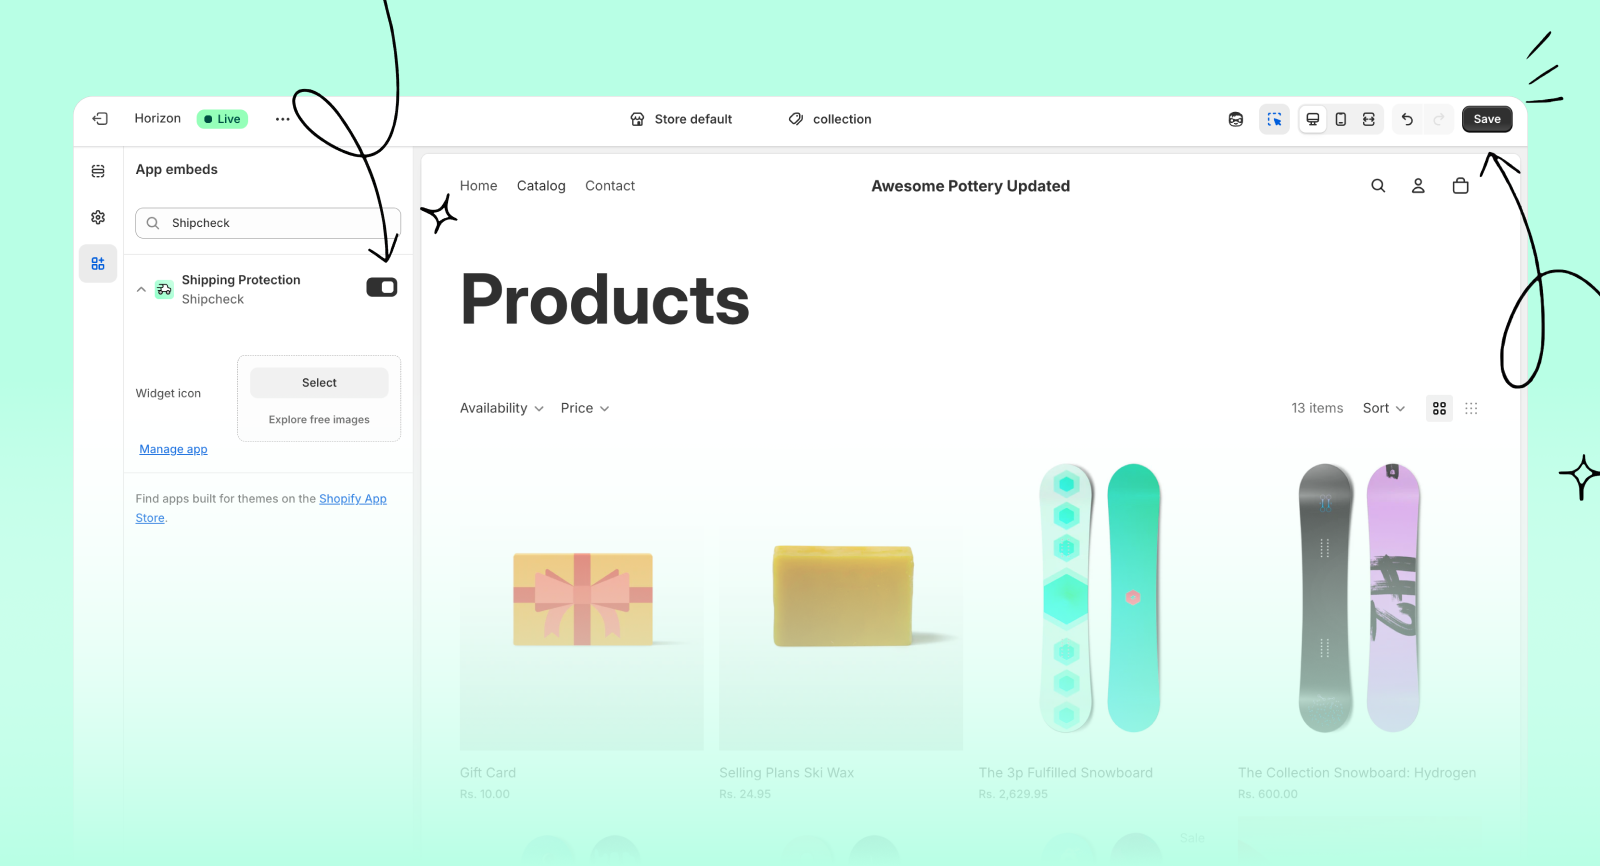
Customize cart extension
- Go to Settings → Cart in the app.
- Here you can change the widget text, colors, layout and more to match your store's branding.
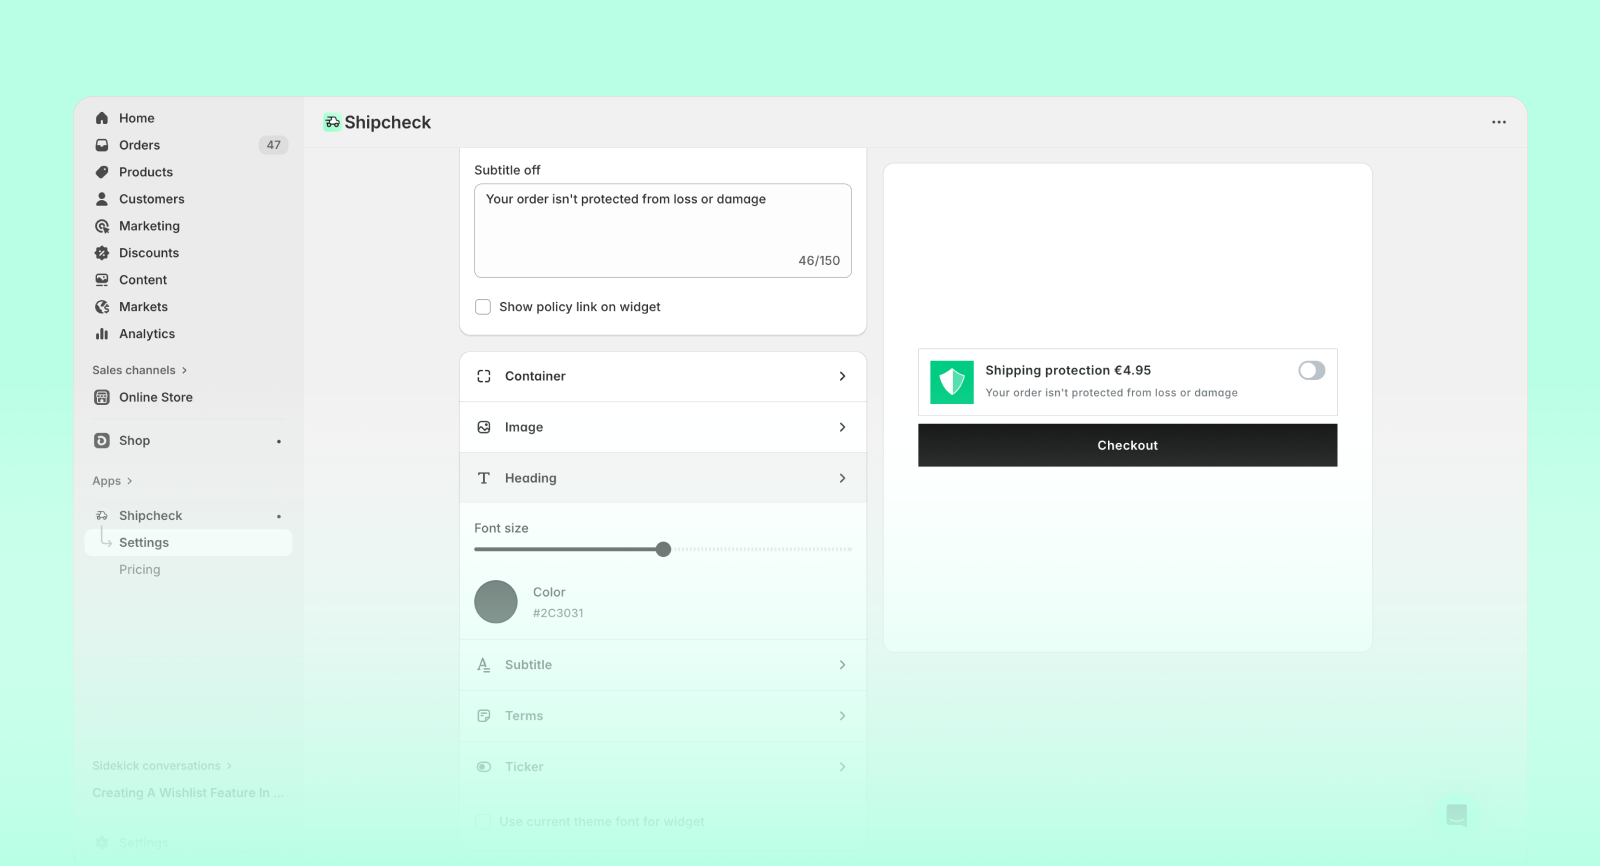
- Click Save to apply your updates.
Enable protection extension
- In your Shopify admin, open the Shipcheck app.
- Click Enable in Installation section to for Cart widget to add Shipcheck to your store's theme.
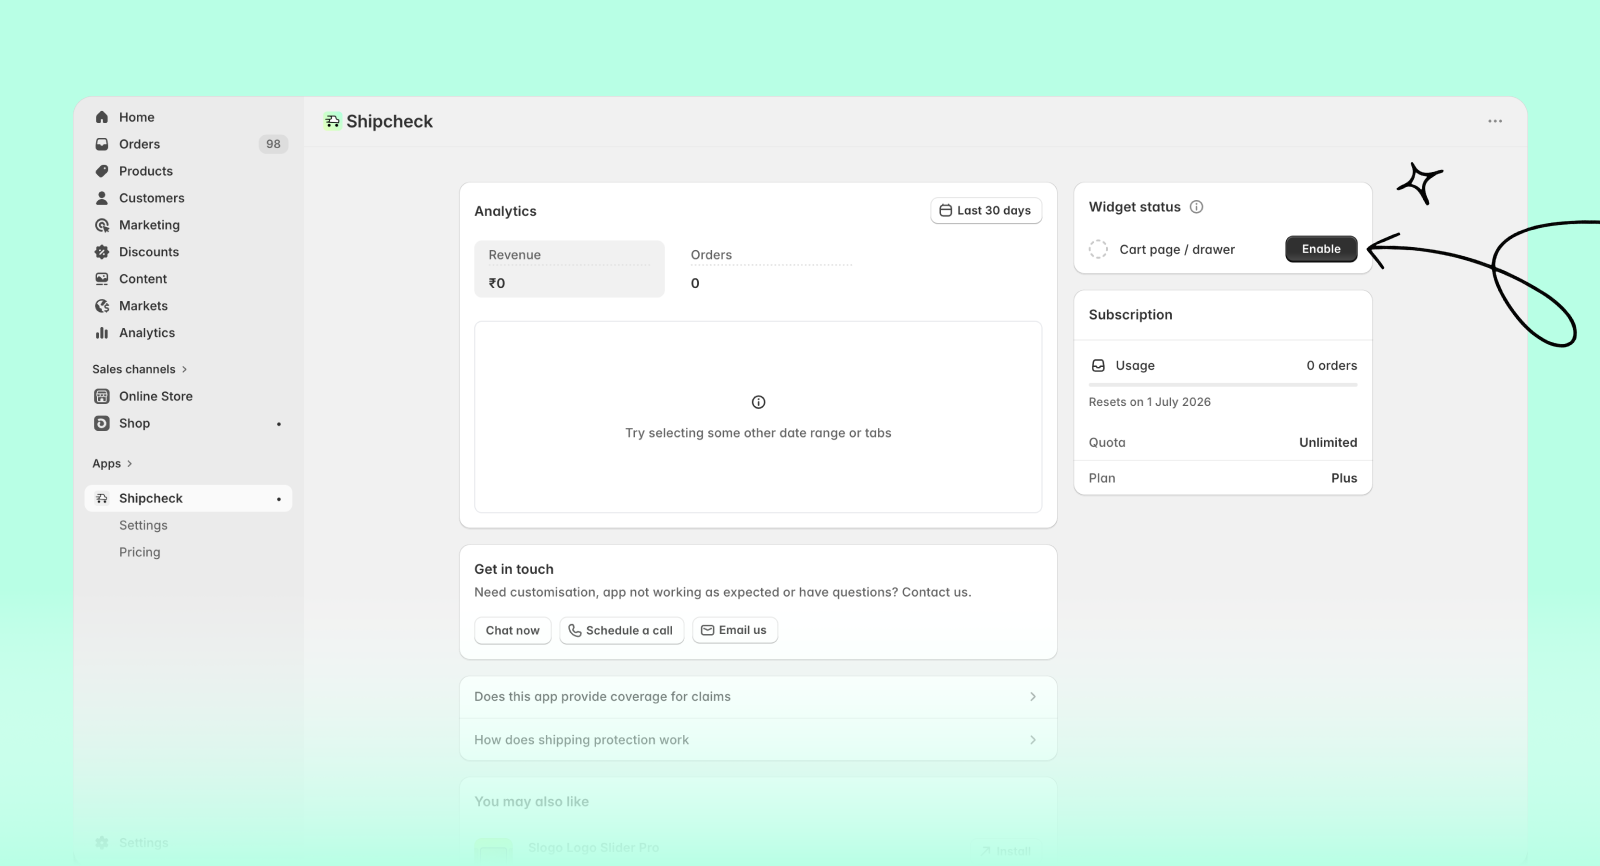
- Click Save to apply the changes.
Test cart extension
- Add any product to your cart and go to the cart page.
- You should see the shipping protection widget displayed.
- Turn on the protection option and proceed to checkout.
- You'll see the shipping protection added on the checkout page.